You are currently browsing the tag archive for the ‘easy cooking’ tag.

These glazed apple muffins are better then cinnamon buns, I promise.
A few years ago I tried following Ayurveda, and though I found it hard to follow the ideal diet for my dosha, I felt really good while I was doing it. So I’ve decided to give it a try again in the hopes that increasing my well-being will decrease my odds of catching one of this year’s nasty flus. So this month’s issue of Yoga Journal, which has an article and recipes for Ayurvedic breakfasts, was just what I needed. I’ve been eating a lot of the Coconut Oatmeal Porridge, which has been doing me right. This Sunday I decided to make the Apple Spice Muffins, both for a break and as a treat for Thing 1 and the friend who had spend the night.
And I screwed them up.
I forgot about the Sucanat (natural sugar) until the moment I was putting the muffins in the oven, at which point it was too late to add sugar to the batter. I went ahead with baking them and then added sweetness to the muffins in the form of a generous maple-syrup glaze.
They came out amazingly good, reminding me of some maple-topped apple muffins Thing 2 and I had tried one early morning from a bakery in York Beach, Maine when we snuck out of our hotel room together and walked the sleepy beach town in the early morning. My little man and I enjoyed these delicious muffins on the beach alone, which is one of my more cherished memories. You can imagine how psyched I was to accidentally recreate the muffins in my kitchen.
Maple Glazed Apple Muffins
makes 12-14 small muffins or 6 gigantic ones
- 2 cups whole wheat pastry flour
- 1 tbs baking powder
- 1/2 tsp salt
- 1 cup milk
- 2 eggs
- 6 tbs ghee, melted (substitute butter if you must)
- 1 tsp vanilla
- 2 apples, peeled and diced into 1/4 inch bits
- 2 tbs maple syrup
- 1 tsp cinnamon
- for glaze: 1/2 cup powdered sugar and 2-4 tbs maple syrup
- Heat oven to 375. Oil muffin tins or line with paper muffin cups.
- Mix flour, baking powder and salt together.
- In another bowl, combine milk, eggs, ghee, and vanilla.
- In yet another bowl, toss apple bits with maple syrup and cinnamon.
- Combine flour mixture with milk mixture and stir until just combined, Fold in apple mixture.
- Fill muffin cups to the top, then bake for 30 minutes or so until they are browning on top.
- Remove muffins from tins and put on a cooling rack. Cool for 5-10 minutes.
- While muffins cool, add maple syrup to powdered sugar 1 tbs at a time until desire consistency is reached. The glaze should be thinner than icing, but not runny. Dip muffin tops one at a time into glaze and set back on rack to allow extra to drip off…if you make the glaze too runny, it will all drip off. If the glaze is a little thick, the heat of the muffins will melt it and help it spread.
- Serve just as soon as the glaze starts to set. You can save leftovers in an airtight container, but don’t be shocked if all the glaze has been magically absorbed into the muffins by the following morning.
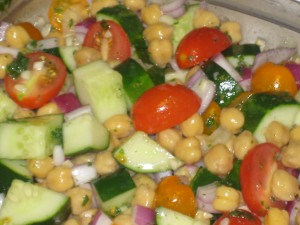
So many colors. I think this would be great with feta or grilled tofu.
My decision to reduce breads and pasta and include more beans and veggies in the Homestead’s menu plan has been a challenge. We really do eat a lot of carbs on a daily basis. Finding new and interesting ways to include beans has been fun, though.
Here’s one new meal we’ve created that makes good use of all the fresh veggies the farmers are selling this month.
Cucumber Salad with Honey Lemon Mint Dressing
serves 4 as a meal
- 2 1/2 cups cooked chickpeas (this is post cooking! I forgot to measure them before soaking)
- 1 small red onion, cut in a medium dice
- 1 huge clove garlic diced finely (or 2 smaller cloves)
- 1 pint cherry tomatoes, halved (I mixed red and orange, since that’s what was in the fridge)
- 2 medium cucumbers, quartered and cut into chunks
- 2 tbs canola oil
- 2 tbs lemon juice
- 1 tbs honey
- handful of mint leaves
- 1/2 tsp or so kosher salt
- Combine cooled, drained chickpeas and veggies in a large container.
- Blend oil, juice, honey, mint, and salt in a blender until just combined. You want the mint leaves to be in decent little bits, not turned to paste.
- Pour dressing over veggies and beans, and toss to coat well.
- Put in the fridge to chill and let flavors combine for about 30 minutes. Toss, taste, and add more salt if needed.
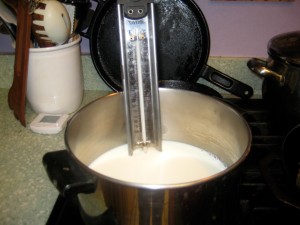
So many of the things I make involve that thermometer clipped to a pot.
It’s raining again today here, and so there was no outdoor fun had. Thing 1 and I decided to whip up a batch of fresh yogurt.
I have a pretty rough relationship with dairy. I can only eat so much before my body bloats and my intestines do the hokey-pokey, and yet I can not give it up completely.
One form of dairy that I can eat without risk of punishment seems to be yogurt, and the best yogurt I’ve ever had was freshly made at home. All milk, with no preservatives, sugar, flavors, colors or newfangled miracle whozits added. However, unlike many of the other things I’ve tried (jams, bread, beer, etc), I have screwed up yogurt quite often, producing lumpy, curdy, runny batches that no one else would even taste. Through trial and error I’ve finally figured out how to produce smooth, tasty yogurt reliably.
Making yogurt is easy, really. Take 4 cups of milk (I have found that whole milk produces the best texture) and put it in a pan with a candy thermometer. Turn the heat on high and heat the milk to 180 and remove from heat. DO NOT STIR. I repeat: DO NOT STIR. If you stir that milk while it’s heating or while it’s cooling, you will get curdy yogurt.
Let the milk cool to about 110 degrees, and as it cools sterilize the containers for the yogurt. I put them all in a big bin with water and a few drops of bleach. I hate using bleach, but I find it does the best job for this purpose. When the milk is cool, rinse all the containers and their lids and line them up near the pan.
For yogurt starter I use yogourmet. I have tried using a few tablespoon of store bought plain yogurt, but the texture was never as good as it is with the powdered starter. I put the starter in one of the cups, then add just enough warm milk to cover. I use a swizzle stick to gently stir them together, then add a little more milk and blend. All of this goes back into the pot, and the starter is stirred in gently but thoroughly with the warm milk.
I use a Donvier yogurt incubator with 8 small yogurt cups, but if and when I replace it I’ll be getting something with one large container. I think one large batch would be less hassle than all these smaller cups migrating around the fridge! The instructions that came with the incubator said to incubate for 8 hours or so, but I find the yogurt is usually done in 5. Once it’s set (and before it starts to separate), the cups go into the fridge until it’s time to eat.
I generally don’t eat the yogurt until it’s chilled since hot jiggly sour dairy is not my thing. I like to use it with fresh fruit and granola and no sweetener, but the kids prefer to stir in a tablespoon or so on homemade jam to make it fruit flavored. I have also used it to make yogurt cheese (another reason I yearn for a 1 quart maker rather than all these little cups), which I enjoyed but the kids thought was weird.
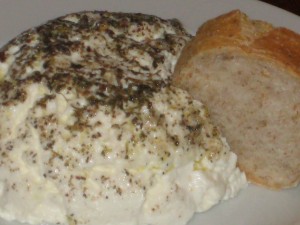
This was so incredibly good.
A few weeks ago I was invited to a dinner meeting at a wonderful Italian restaurant in Metuchen, NJ, called Novita. Before heading up there, I checked out their menu online (as a vegetarian, I have to check out restaurants in advance to make sure I can eat something), and I saw that an appetizer featuring homemade ricotta cheese, which I resovled to try.
It was wonderful, and I decided then to try my hand at making this treat at home. I poked around the internet for a while and found one recipe at many, many sites, but the easiest incarnation of it is at Becks and Posh, where they are kind enough to not make it a slideshow or include lots of pictures of each step.
I used this recipe, but cut in it half (mainly because I had already begun using my gallon of milk for other projects, so I no longer had a full gallon to dedicate to this one). I didn’t have any cheesecloth, so I used a single layer of cotton sack cloth which I have on hand for my bread making, and it worked just fine. The whole process took about an hour, but hands on time was only 10 minutes or so.
The resulting cheese was slighlty sweet, and a little gooey, much nicer than store bought ricotta. I tried some still warm on a cinnamon raisen English muffin with a drizzle of honey and then served up a cup of it with whole wheat bread at dinner.
To make the bread spread seen above, I took a 1 cup measuring bowl, rubbed it with olive oil and sprinkled Kosher salt, fresh pepper, and dried Italian herbs around the inside, then stuffed in the cheese. I put a small plate on top, flipped it over carefully, and removed the cup. I liked this so much that I plan to serve it at Thanksgiving as part of the traditional cheese tray.
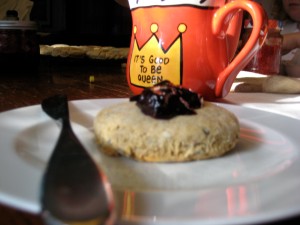
A freshly bakes scone topped with blueberry marmalade is one of my favorite ways to start the day.
It’s been a long time since we’ve enjoyed fresh scones here at the Homestead, so I decided to whip up a batch this morning. I wanted to use some of that culinary lavender I picked up at the Atlantic Spice Warehouse, and I usually cut the recipe with while wheat flour to make brown scones…so I made Lavender Brown scones. As a huge fan of the Harry Potter books, this makes me smile.
Lavender Brown Scones
makes 12-14 decadent scones
- 1/2 cup buttermilk
- 1/2 cup heavy cream
- 1 egg
- 1 tbs sugar
- 2 cups unbleached all-purpose flour
- 1 1/2 cups whole wheat flour
- 2 heaping tsp baking powder
- 1 tsp baking soda
- 2 tbs dried lavender buds, culinary grade
- 1/2 cup butter, melted
- Preheat oven to 350.
- Combine buttermilk, cream, egg, and sugar and beat until well blend.
- In another bowl, mix flours, baking powder, baking soda, and lavender buds. Beat flour mixture into milk mixture until well blended, then mix in butter.
- Turn dough out onto lightly floured surface. Roll out to 1/4″-1/2″ thick. Using a glass dipped in flour, cut out round scones. Move scones to baking sheet. (I line mine with a silicone liner, but it’s probably not necessary. These scones don’t stick.)
- Bake at 350 for 20-25 minutes, until tops just start to turn brown. Alternatively, you can cook them like pancakes on a skillet over low heat for 5-9 minutes each side, though this tends to scorch the outside and not be as pretty.
